Preface
This post does not provide a knitting tutorial. YouTube has many excellent teaching videos. I’m describing my experience, learning from how I learn to knit, and learning to translate directions provided by my loving wife Martha.
Cast On

Casting on places the first row of loops on a needle. Martha demonstrated how to do cast on, then let me try it. My fingers flopped around as I tried to grasp the thread. Also, because my visual memory sucks, I couldn’t remember what I had just seen, let alone repeat it. She walked me through a few loops, step by step; finally I was able to do a few on my own. She helped me get 20 loops on a needle.
Knit Stitch
Martha explained the first basic stitch I needed to learn was the knit stitch. She demonstrated, then I tried, encountering the same difficulty I had casting on. I couldn’t remember what I had just seen. Again she walked me through a few loops step by step and finally I was able to do a few on my own. My fingers dropped the yarn, loops fell off the needle, or I poked the point through the wrong part of the loop.
Eventually we completed a row together. She told me to do another row. After I had two loops on the needle, she started to walk away. I cried. (Well not really, but she had to come back and help me.) Even after completing several rows, I felt incompetent. Whenever I made a mistake, she had to correct it. Also, I couldn’t see the big picture – how all the stitches were creating a pattern.
Starting Over
I wanted to start over from scratch, so I would be able work on my own when she wasn’t there. If I made a mistake that I didn’t know how to fix, instead of being stuck and unable to continue, I had would have a fall-back.
After ripping out the stitches, I couldn’t remember how to cast on. She demonstrated again, but I was still having trouble. Then she said there was an easier way for beginners, called knitting on. She showed me that; it was not easier.
youTube to the Rescue
Eventually, I learned how to cast on by watching YouTube. I found a tutorial that I could pause or play over as many times as I wanted. Next I found a YouTube video demonstrating the knit stitch. That was harder to learn, but eventually I started to get it.
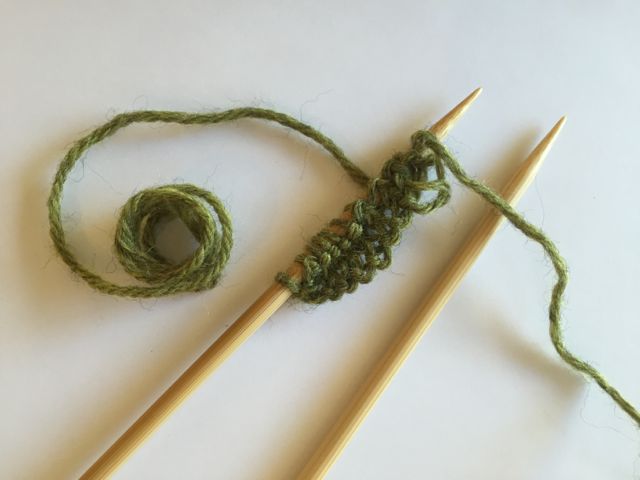
Knitting with String
Because I was having trouble with strands of yarn unravelling, or poking the point of the needle through the middle of a strand, I found a ball of string in the garage and started knitting with that. It was easier to grasp with my fingers and easier to work with because the strands didn’t unravel. Still, every time I made a mistake, I had to rip out all my stitches and start over. One big problem was not knowing what I was doing wrong. The other problem was not knowing how to fix it.
Eventually I learned how to fix some errors by watching more YouTube videos, then intentionally making mistakes and fixing them. I also went back to the yarn store and purchased a handy fix-it tool.
Some Lessons Learned So Far
- Knitting is harder than cooking. With cooking, after learning a few basics, you can make a grilled cheese sandwich. I expect it will be weeks before I’m ready to start a real knitting project.
- Small wooden needles were easier to use because they are sharper, lighter and less slippery, so the thread does not slip off the tips.
- It’s also easier to make mistakes with wooden needles by poking them through the middle of a strand of yarn.
- Like other beginners, my first stitches were too tight, making it harder to get the needle through loops.
- The knitted work has two different sides, called the right side and the wrong side. After each row, I need to flip over the work.
- Knitting the first few rows, I needed to be careful not to knit the tail into the work.
- Before I knew how to correct mistakes, I found knitting stressful, terrified I would do something wrong and have to go back to Start. Knowing I can correct mistakes, it’s now easier to relax and actually enjoy knitting.
- Yarn gets really frayed after starting over several times, making it much more difficult to work with. After a few do-overs, it’s better to cut off and discard the used yarn.
- The lady at the yarn shop who sold me the knitting tool is friendly and helpful.

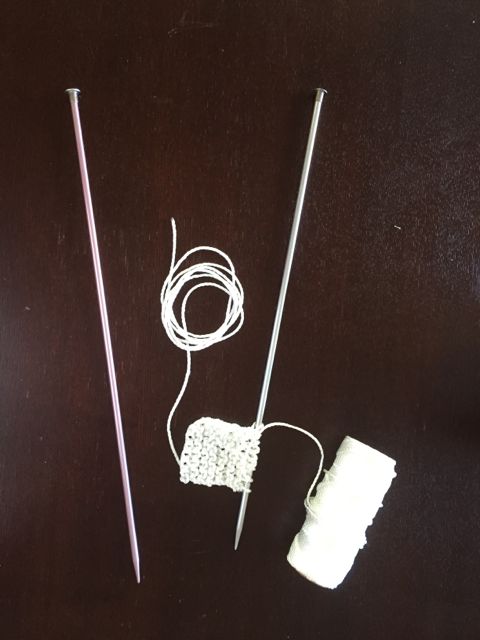
Smaller wooden needles are at the right. Handy fix-it tool at bottom left
Footnote
Don’t infer that I learned everything from YouTube. I needed Martha’s help to get started, and I know I’ll want more help and hand-holding as my work progresses. She is the knitting Samurai. From her I learned what knitting actually looks like, how to hold the needles, how to hold yarn and move the needles, and what to look for in the finished product. More importantly, I’m inspired by the joy she puts into her work.